How to install thatch palm leaves. Synthetic thatch guide
- A-thatch
- April 3,2026
- 11:02 AM
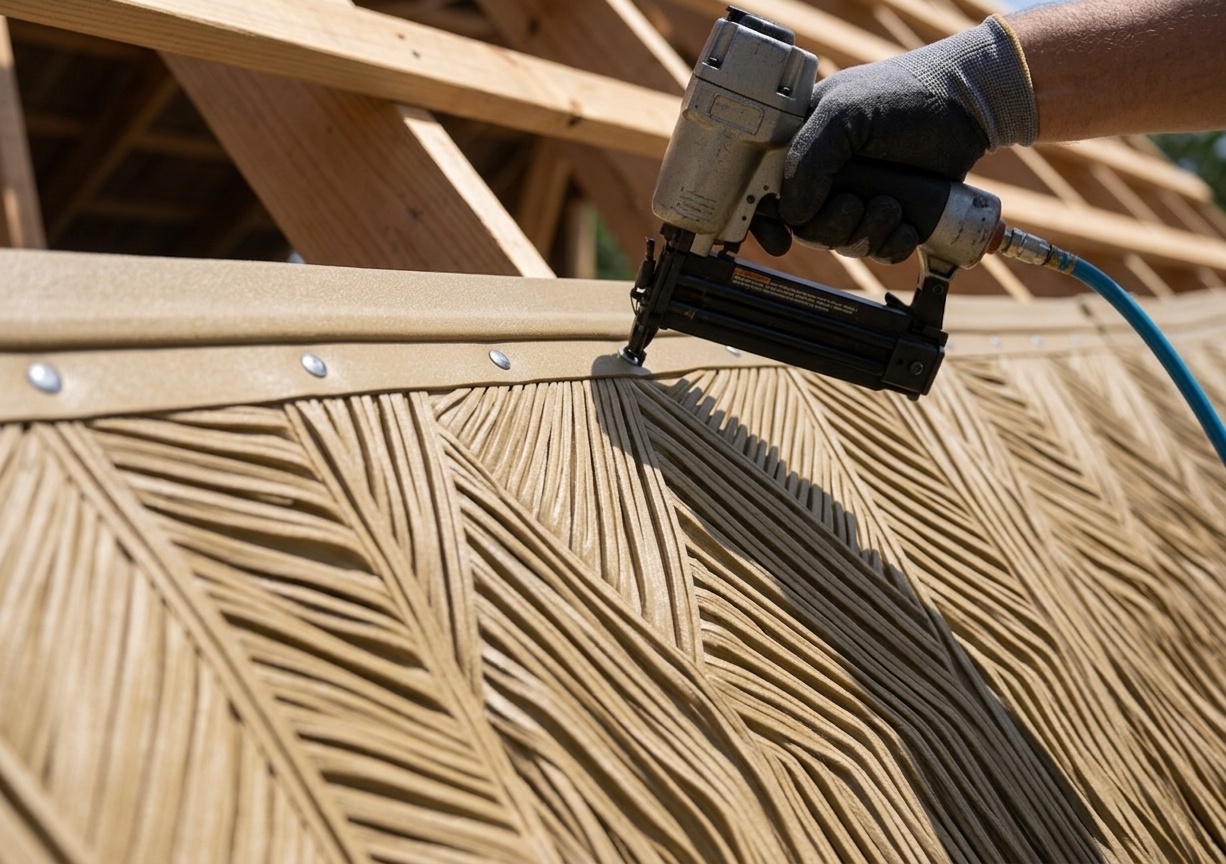
How to Install Synthetic Palm Thatch: A Step-by-Step Guide
If you are looking to install synthetic palm thatch, you have made a smart choice for a durable, low-maintenance tropical roof. Therefore, this guide will walk you through the essential steps to securely mount engineered HDPE panels. Furthermore, unlike natural materials, artificial foliage provides consistent coverage, superior weather resistance, and an incredibly straightforward installation process.
Tools Needed to Install Synthetic Palm Thatch
Before climbing the ladder, ensure you have the right equipment on hand. Consequently, gathering these supplies early will save you time:
HDPE synthetic thatch panels or bundles.
Corrosion-resistant fasteners (stainless steel or galvanized screws).
A chalk line, measuring tape, and a utility knife.
Approved roof battens or a solid plywood substrate.
4 Steps for a Perfect Installation
1. Prepare the Roof Base
A clean, square base is the difference between a straight finish and a wavy roof. First, replace any rotten wood and tighten loose sheathing. Next, set your batten layout to match the panel design and mark your lines using a chalk line to keep everything perfectly aligned.
2. Set the Starter Course
Start at the bottom edge, also known as the eave. By aligning the first row perfectly straight, you make the rest of the job exponentially easier. Additionally, fasten the panels securely at the manufacturer’s recommended points so they cannot lift in high winds.
3. Overlap and Stagger Joints
Consistent exposure helps the roof shed water effectively. Therefore, overlap each new row to completely hide the fasteners of the previous course. Moreover, stagger the side seams so you do not accidentally create vertical channels for rain to leak through.
4. Detail Transitions and Ridges
Most leaks start at corners and valleys. To prevent this, use system-matched ridge caps and edge trims. In other words, keep drainage paths clear of bulky buildup and reinforce your fasteners along the edges where wind pressure is highest.
Synthetic vs. Natural Thatch Installation
Why go through this process with engineered materials? Here is a quick look at why contractors prefer artificial options over organic palm leaves:
| Feature | Natural Palm Leaves | Synthetic Palm Thatch |
| Fastening | Requires specialized tying and weaving | Standard screw or staple gun |
| Overlap | Highly variable and messy | Predictable and uniform |
| Fire Safety | Highly Flammable | Class B1 Fire-retardant available |
Final Inspection and Maintenance
Ultimately, a reliable roof requires a quick post-installation check. After completing the job, walk around the structure to visually inspect all fasteners and trims. Finally, schedule periodic checks after heavy storms to ensure no leaves or debris are trapped in the valleys, guaranteeing your roof stays pristine for decades.
Categories
Related content
How long does a thatched roof last? Natural vs. Synthetic
tiki hut roof replacement materials for 2026: best options to stop rot
Synthetic thatch for theme parks and zoos: Which type is best? – A-thatch
Synthetic thatch palm leaves for resort construction – A-thatch
Synthetic Mexican thatched gazebo: DIY look, materials & durability – A-thatch